The Project Begins
Today, we started the preliminary stages of building the Little Holey Vengeance pedal board. I picked up my plans as Staples last night and today I went and got a 2′ x 4′ piece of oak cabinetry grade plywood.
To start out with, I immediately noticed an issue with the plans. The holes were too big. I carefully sized these in Photoshop so they were 3/8″ in diameter. They printed at 3/4″. Evidently the rulers and grids in Photoshop aren’t that accurate, though all the other measurements seem to be fine. Go figure. This is why I need to learn how to use CAD software. Regardless of that, we proceeded to cut out the template so we could transfer it to the board.
We attached the template using a few dots of double faced tape. Then we penciled the design on around the edges. Next we used a nail to punch the centers of each hole so we would know where to drill. That didn’t work so well though since Staples evidently stretched the image a bit even though I told them not to scale it at all. All the holes ended up being slightly off. I don’t recommend Staples for printing plans at all. When scale is important doing something like this is not acceptable.
Here is the transferred template.
Normally, I would cut the overall design out first and work my way in to the other cuts. This time we figured it would be easier to cut the holes first since we were using a jig to keep the holes straight.
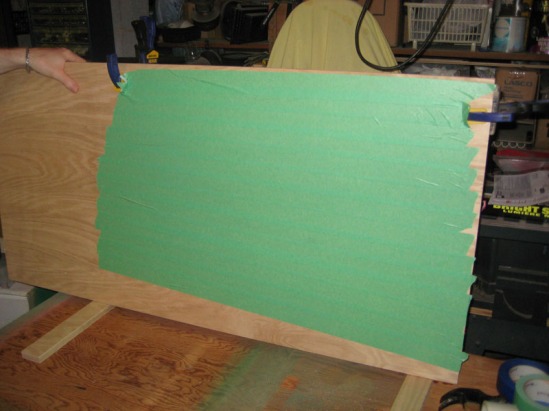
First of all we wasted some time and tape on the back of the board.
The point here was to try and keep the wood from splintering as the drill bit came through. That didn’t happen, of course. This technique works fine when sawing a piece of wood, but when drilling with a paddle bit in plywood it’s a total waste. The first few holes splintered badly so we had to start drilling only part way through the board and then flipping it over to drill through the other way to finish them off.
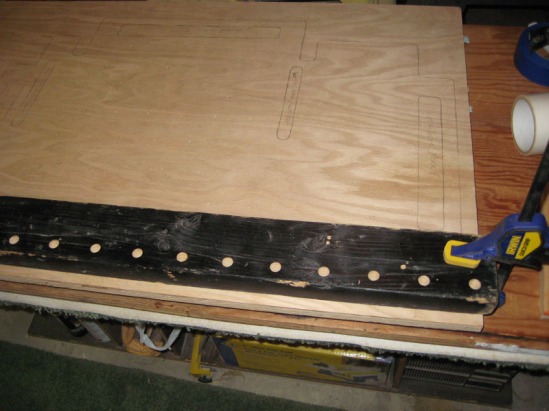
Here is a photo of the jig in place.
Basically, I took a 2″x4″ and drew a straight line on it, then marked every 2-1/4″ on that line and drilled 1/2″ holes with a paddle bit on my drill press. We went with 1/2″ after deciding 3/8″ wasn’t quite large enough. Ideally you can drill every hole on the pedal board on a drill press if you have one large enough, but if you don’t then a jig like this will let you drill neat holes on the top of the board and keep the hole straight all the way through it, which can be difficult with a hand drill.
We lined up the outermost holes and clamped the jig in place. Then I used the same 1/2″ paddle bit on a hand drill to pilot the holes through the board.
Once the first row was done we marked where the edge of the jig was and then measured up 2-1/4″ from that mark and realigned the jig for the next row, shifting it to the side since the holes in each row are offset with the rows on either side. We continued moving the jig and drilling as we moved up the board.
You can see where we where only drilling part of the way through as we progressed so we could finish it more cleanly from the other side. We ended up drilling a few less holes than originally intended. Since the plans got scaled a bit we had to shift things on the fly and the spacing didn’t work out as originally intended. Some of the holes were a little too close to the edge of the board so we opted not to drill them. It’s not a big deal thankfully considering the way I intend to lay out the board. If the plans had been printed correctly it wouldn’t be an issue.
Here is the main board with all the holes drilled, plus one extra we have to fill. I got the jig clamped in the wrong place once when I got distracted. Once they were all cut we filled the accidental hole and puttied the chipping on the back were the first few holes splintered the wood. That was it for this evening.
Preview of Phase 2
Once it all dries tomorrow I’ll continue by sanding it smooth and countersinking the holes just a bit to soften the edges. Then it’ll be time to cut out the main board. I’ll get most of it with a combination of a table saw and band saw. Then I’ll use a scroll saw to cut out the inside of the handles. Jigsaws just aren’t accurate enough for me.
After that we’ll repeat this process with the legs and the top shelf. Then it’s on to sanding, routing, and finishing the wood before putting the other hardware on. I’m hoping to get Everything cut and drilled tomorrow in phase 2. If I’m lucky I may get all the sanding and routing done as well. Then it’ll be a long finishing process over the next week or two. I have to seal the wood and then spray several coats of color and clear lacquer on it.
Stay tuned for Phase 2 later this weekend.


